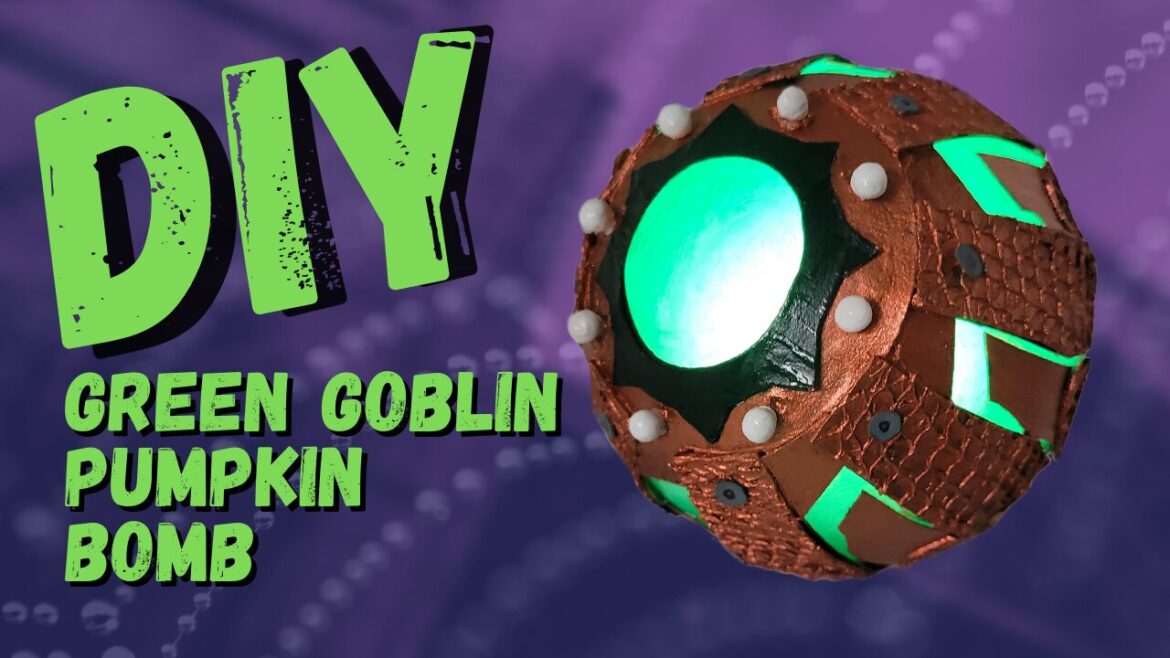
The Green Goblin from the original Sony Spider-Man movies with Tobey Maguire is iconic. He had so many cool weapons and costumes in those movies. One of the most memorable weapons are Green Goblin’s pumpkin bombs. They’re metallic and light up, and just look so epic. I was planning to make one earlier this year and then the trailer for Spider-Man No Way Home dropped so I decided to wait, because (to everyone’s surprise) a Green Goblin pumpkin bomb was in it!
The movie is finally out so I finally decided to make a pumpkin bomb to celebrate its release. I hope you like it!
Material List:
- Computer Paper: https://amzn.to/3B8NpDP
- Chipboard (I used old cereal boxes): https://amzn.to/3omh7xE
- 3 in plastic snap ornament: https://amzn.to/3PP2WNs
- Onion bag or mesh: https://amzn.to/3aTNT6j
- Push Light w/ Remote Control: https://amzn.to/3PJDBEj
- Scissors: https://amzn.to/3v6srlg
- Super glue: https://amzn.to/3z53GY2
- White glue: https://amzn.to/3v2cbBK
- Craft paint (green, black, copper, grey, white): https://amzn.to/3v4YUZ2
- Paint Brushes: https://amzn.to/3OluJnf
- Glue – Gloss: https://amzn.to/3ooaJpu
- Tape (if needed): https://amzn.to/3Pv8RaG
* Disclosure: Some of the links above are affiliate links. This means that, at zero cost to you, I will earn an affiliate commission if you click through the link and finalize a purchase. Thank you! *
Steps To Make A Pumpkin Bomb:
- Unwrap a 3 inch clear plastic snap ornament.
- Cut off the little tab where you can hang it.
- Use sand paper to sand the inside of the ornament until it looks frosted.
- Paint the inside of the ornament with a mixture of white glue, green craft paint, and a splash of water. Let this dry.
- Meanwhile, print out the template.
- Cut out the top circle pieces from the template and trace onto cereal box cardboard.
- Cut out the side pieces from the template and trace each one 8 times into cereal box cardboard. You will have a total of 16 pieces per size.
- Keep them all separate from each other, it makes it easier to glue down quickly.
- For the embellishment pieces… use white glue to glue on any mesh you have handy before cutting these pieces out. I used the mesh from an onion bag in 2 layers.
- Alternatives to mesh: pieces of a screen, make a checker board pattern out of thin strips of cardboard/paper, puffy paint, etc.
- Insert a remote control light into the ornament and close the ornament. Make sure your light has batteries in it.
- Use super glue to glue on circle piece #1 to the top of the ornament.
- Use super glue to glue on circle piece #2 onto circle piece #1.
- Use super glue to glue on 8 long side pieces and 8 small slanted pieces, alternating between the two.
- Use super glue to glue on the textured embellishment pieces.
- Flip ornament over and repeat this process on the bottom side.
- Paint all cardboard pieces in black craft paint. Do not paint the plastic ornament.
- Paint all of the black in metallic copper craft paint, with the exception of circle piece #2… leave that piece black.
- Paint a separate piece of cereal box cardboard in dark grey.
- Cut out 16 tiny cycles from this painted cardboard and super glue onto the tops of the textured embellishment pieces.
- Roll 16 tiny balls of oven bake clay and bake as per the directions on the package.
- If you do not have clay, beads or tiny balls of foil will give you a similar effect.
- If you do not have transparent clay or beads, paint these balls with white craft paint.
- Super glue onto circle piece #1.
- Use a gloss glue to paint the black circle piece #2 and all of the white balls. When dry, it will stay glossy.
- Enjoy!
Template:
**prints out on one page of regular computer paper (8.5×11 inch)**

