Hi everyone, I’m Stephen and today I’m using cardboard to make Spider-Man’s web shooters from the Amazing Spider-Man 2!
These web shooters are easy to make out of 1 cereal box and a little paint. Springs from old pens help make it fire paper bullets! They actually shoot pretty far, so don’t be fooled by the video (I needed to stand closer to the target to show everything on camera).
Anyway, these web shooters are my most requested prop, so I hope you guys like them!
Must be a firm but thin piece of cereal box chipboard.
I used cardboard from the box of a sturdy family sized cereal box.
All other pieces can be cut out of regular cereal boxes.
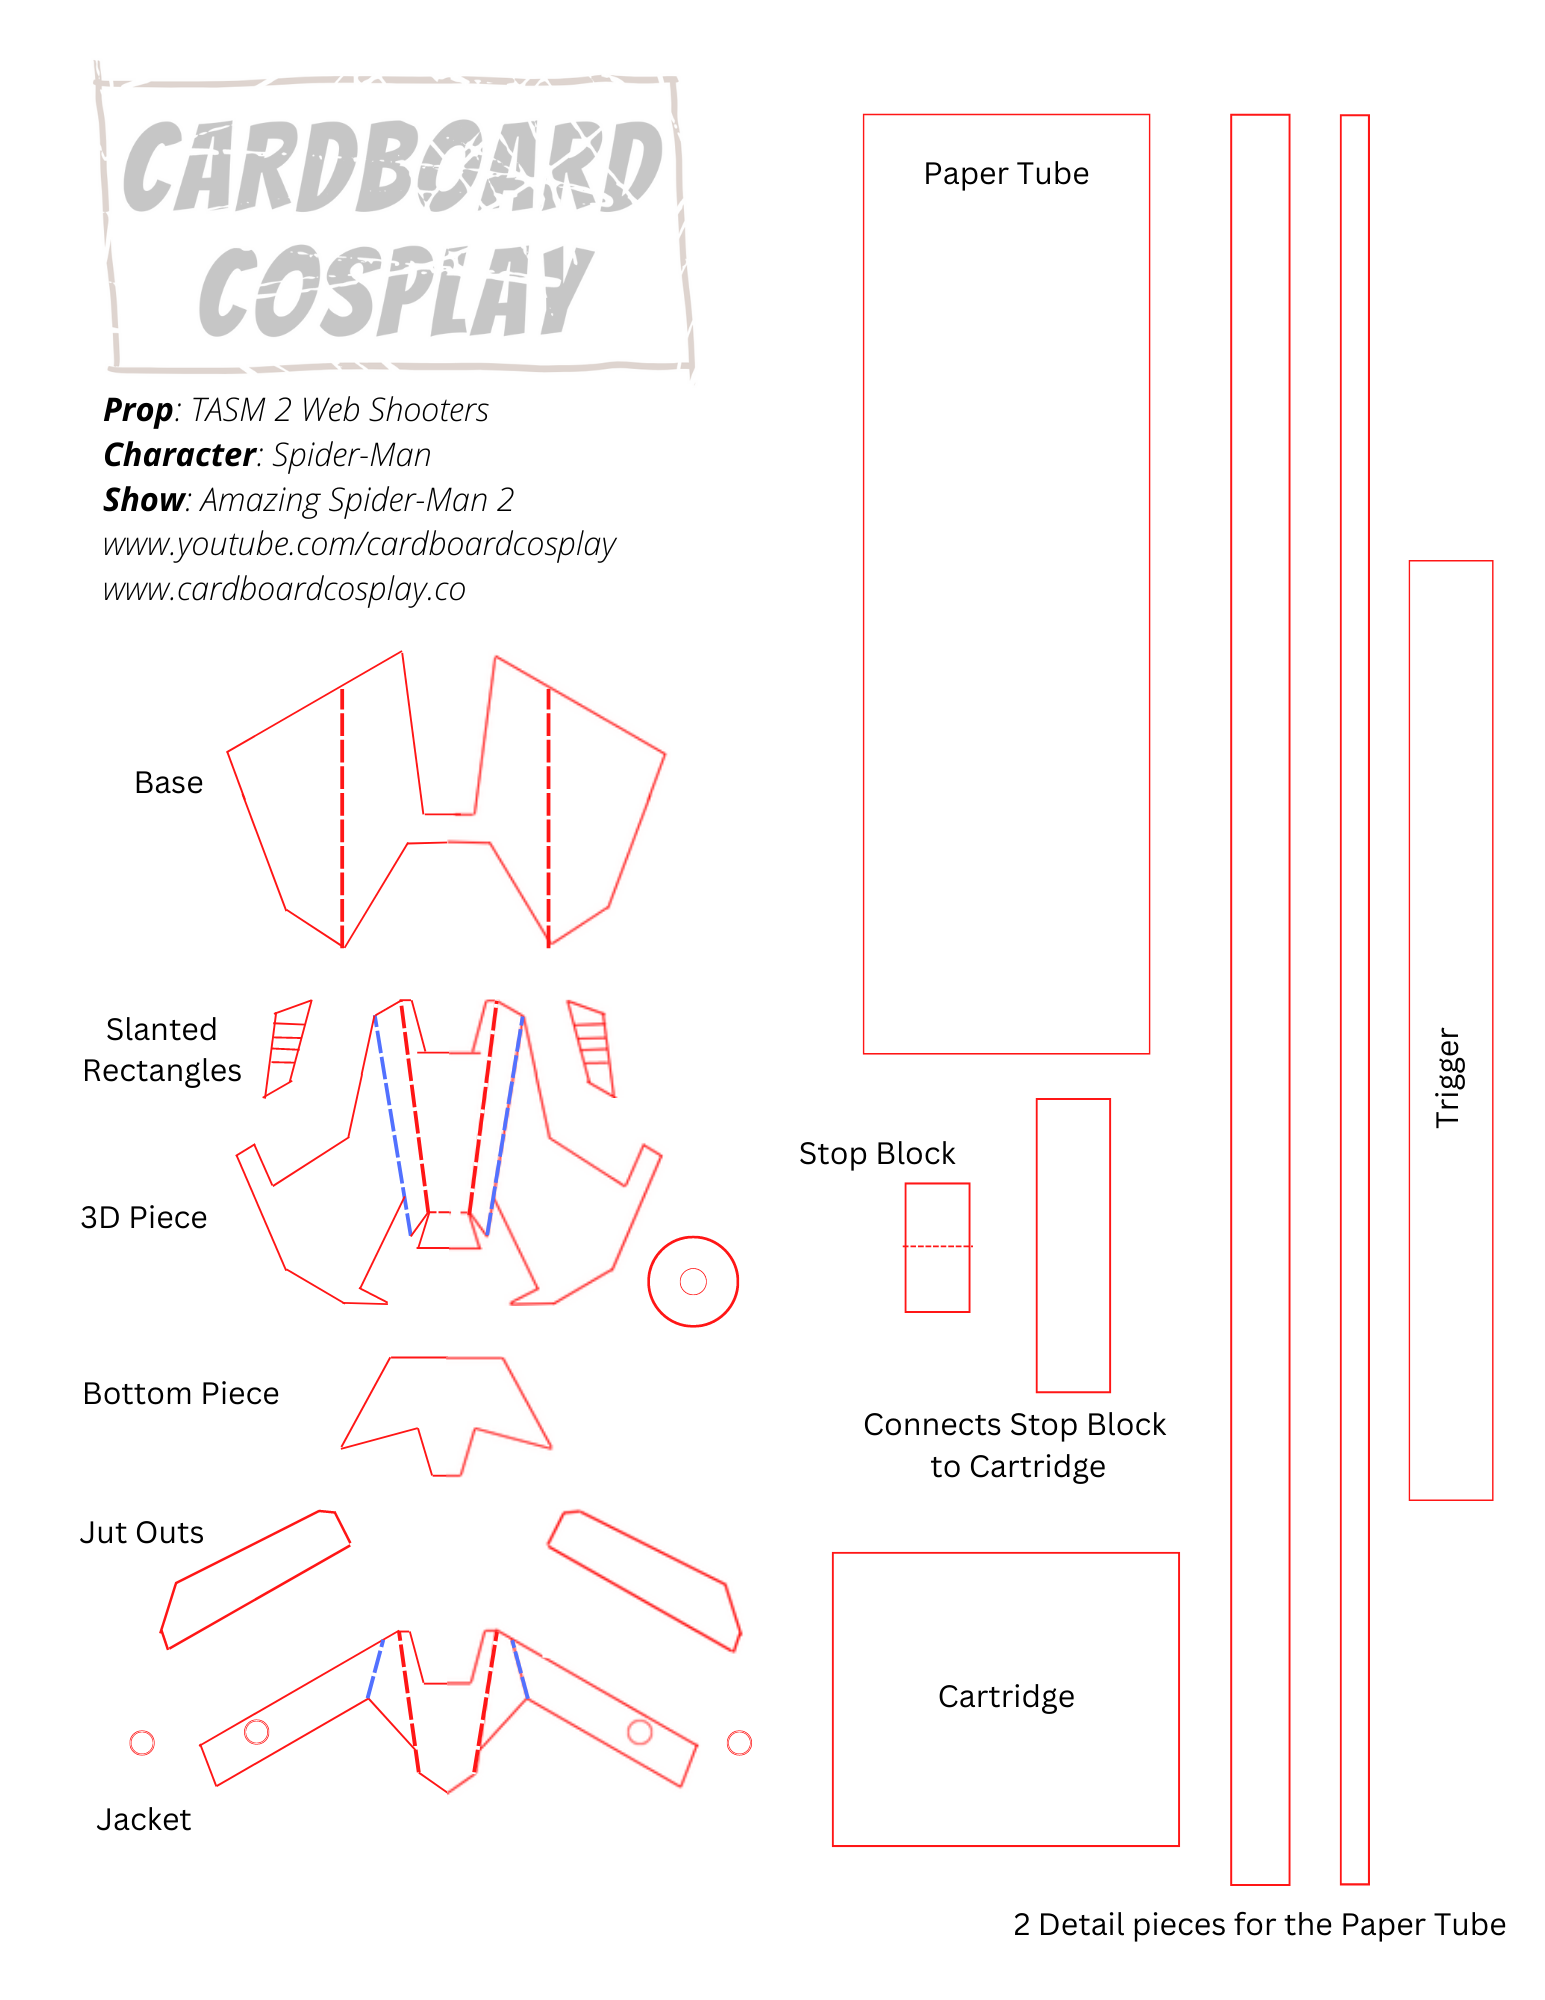
For the 3D piece and the “jacket”:
The dotted lines should be scored, not cut all the way through.
Scored the dotted red lines on the front and the other dotted lines on the back side.
Tip: add extra tape during the cutting process to help keep the sliced up template in place.
Fold all the scored lines so the pieces are 3 dimensional.
Glue together with superglue.
Feel free to trim out the little rectangle on the base. It isn’t needed now that it’s good together.
Carefully cover the entire web shooter in super glue. The super glue makes it super hard.
Tip : open a window and use a mask because super glue fumes are nasty.
Jut outs:
Layer cereal box cardboard, cut them out, and glued them on the base.
Add additional details in cereal box cardboard.
SHOOTING MECHANISM:
Cut rectangles from the template, roll up the paper, and super glue it so it wouldn’t unravel. One end of this roll sticks out from the web shooter and that end needs some extra design details.
Roll the thin strips of paper around the end. There are 2 strips.
Take the springs out of 2 push pens.
Twist together.
Use scissors to flatten out a tiny bit from the end of the spring.
Poke that wire into a small piece of cereal box cardboard.
Add hot glue so the spring will stay in place.
Super glue to the bottom of the paper tube.
Optional: reinforce the bottom with tape and more glue.
Trim the spring if it is sticking out of the end of the paper tube.
BULLETS:
The paper bullets are just rolled up paper covered in super glue so they don’t unravel but also do they stay hard. Make sure it fits comfortably inside the paper tube.
STOP BLOCK:
Layer 3 pieces of cereal box cardboard with super glue.
Fold in half.
Add more super glue so it’s hard.
CARTRIDGE:
It’s a rolled up piece of cereal box cardboard that you will need to lightly squish to make it oval shaped.
Slid it over the shooting mechanism.
Super glue kept it all in place.
ASSEMBLY: Glue the stop block to the bottom of the cartridge by taking a small strip of cereal box cardboard, glyph one end to the bottom of the cartridge and the other end to the bottom of the stop block. It will look like a wiggly hinge.
Wrist strap: just a strip of cereal box cardboard that you can fit around your wrist.
Paint everything in red, black, or silver.
Using a pen, draw 3 or 4 lines into the silver bits.
Glue together.
Make the trigger.
To make the trigger, stack together 4 layers of cereal box cardboard, bend it into an ergonomical / slightly curved shape, and coat completely in super glue so it becomes super hard.
