")
This week I made an Iron Man Arc Reactor out of cereal box cardboard and a piece of scrap plastic. This Arc Reactor design is from Iron Man 2.
This may be an unpopular opinion, but this arc reactor design is my favorite one … I like the simplicity with the triangles. If you want to wear it as a costume, I recommend adding hook and loop (ie velcro) to the back of it and to your shirt…or hot glue it onto a shirt. As for me, I’m going to use it as a night light in my bathroom haha.
This video has been requested a bunch of times, so I hope you like it!
Materials List:
- Computer Paper: https://amzn.to/3B8NpDP
- Chipboard (I used old cereal boxes): https://amzn.to/3omh7xE
- Corrugated cardboard: https://amzn.to/3IW9mb6
- Scissors: https://amzn.to/3v6srlg
- Utility blade: https://amzn.to/3orJXMV
- Clear plastic (I used a salad tub)
- Push Light w/ Remote Control: https://amzn.to/3PJDBEj
- Wax paper (optional): https://amzn.to/3aYCCBE
- Masking Tape: https://amzn.to/3Pv8RaG
- White glue: https://amzn.to/3v2cbBK
- Glue gun: https://amzn.to/3PwdPnp
- Glue sticks: https://amzn.to/3PFlX4w
- Tin Foil: https://amzn.to/3IV2QBo
- Craft paint (black, silver, blue): https://amzn.to/3v4YUZ2
- Paint Brushes: https://amzn.to/3OluJnf
* Disclosure: Some of the links above are affiliate links. This means that, at zero cost to you, I will earn an affiliate commission if you click through the link and finalize a purchase. Thank you! *
Steps to Make Iron Man Arc Reactor (Iron Man 2):
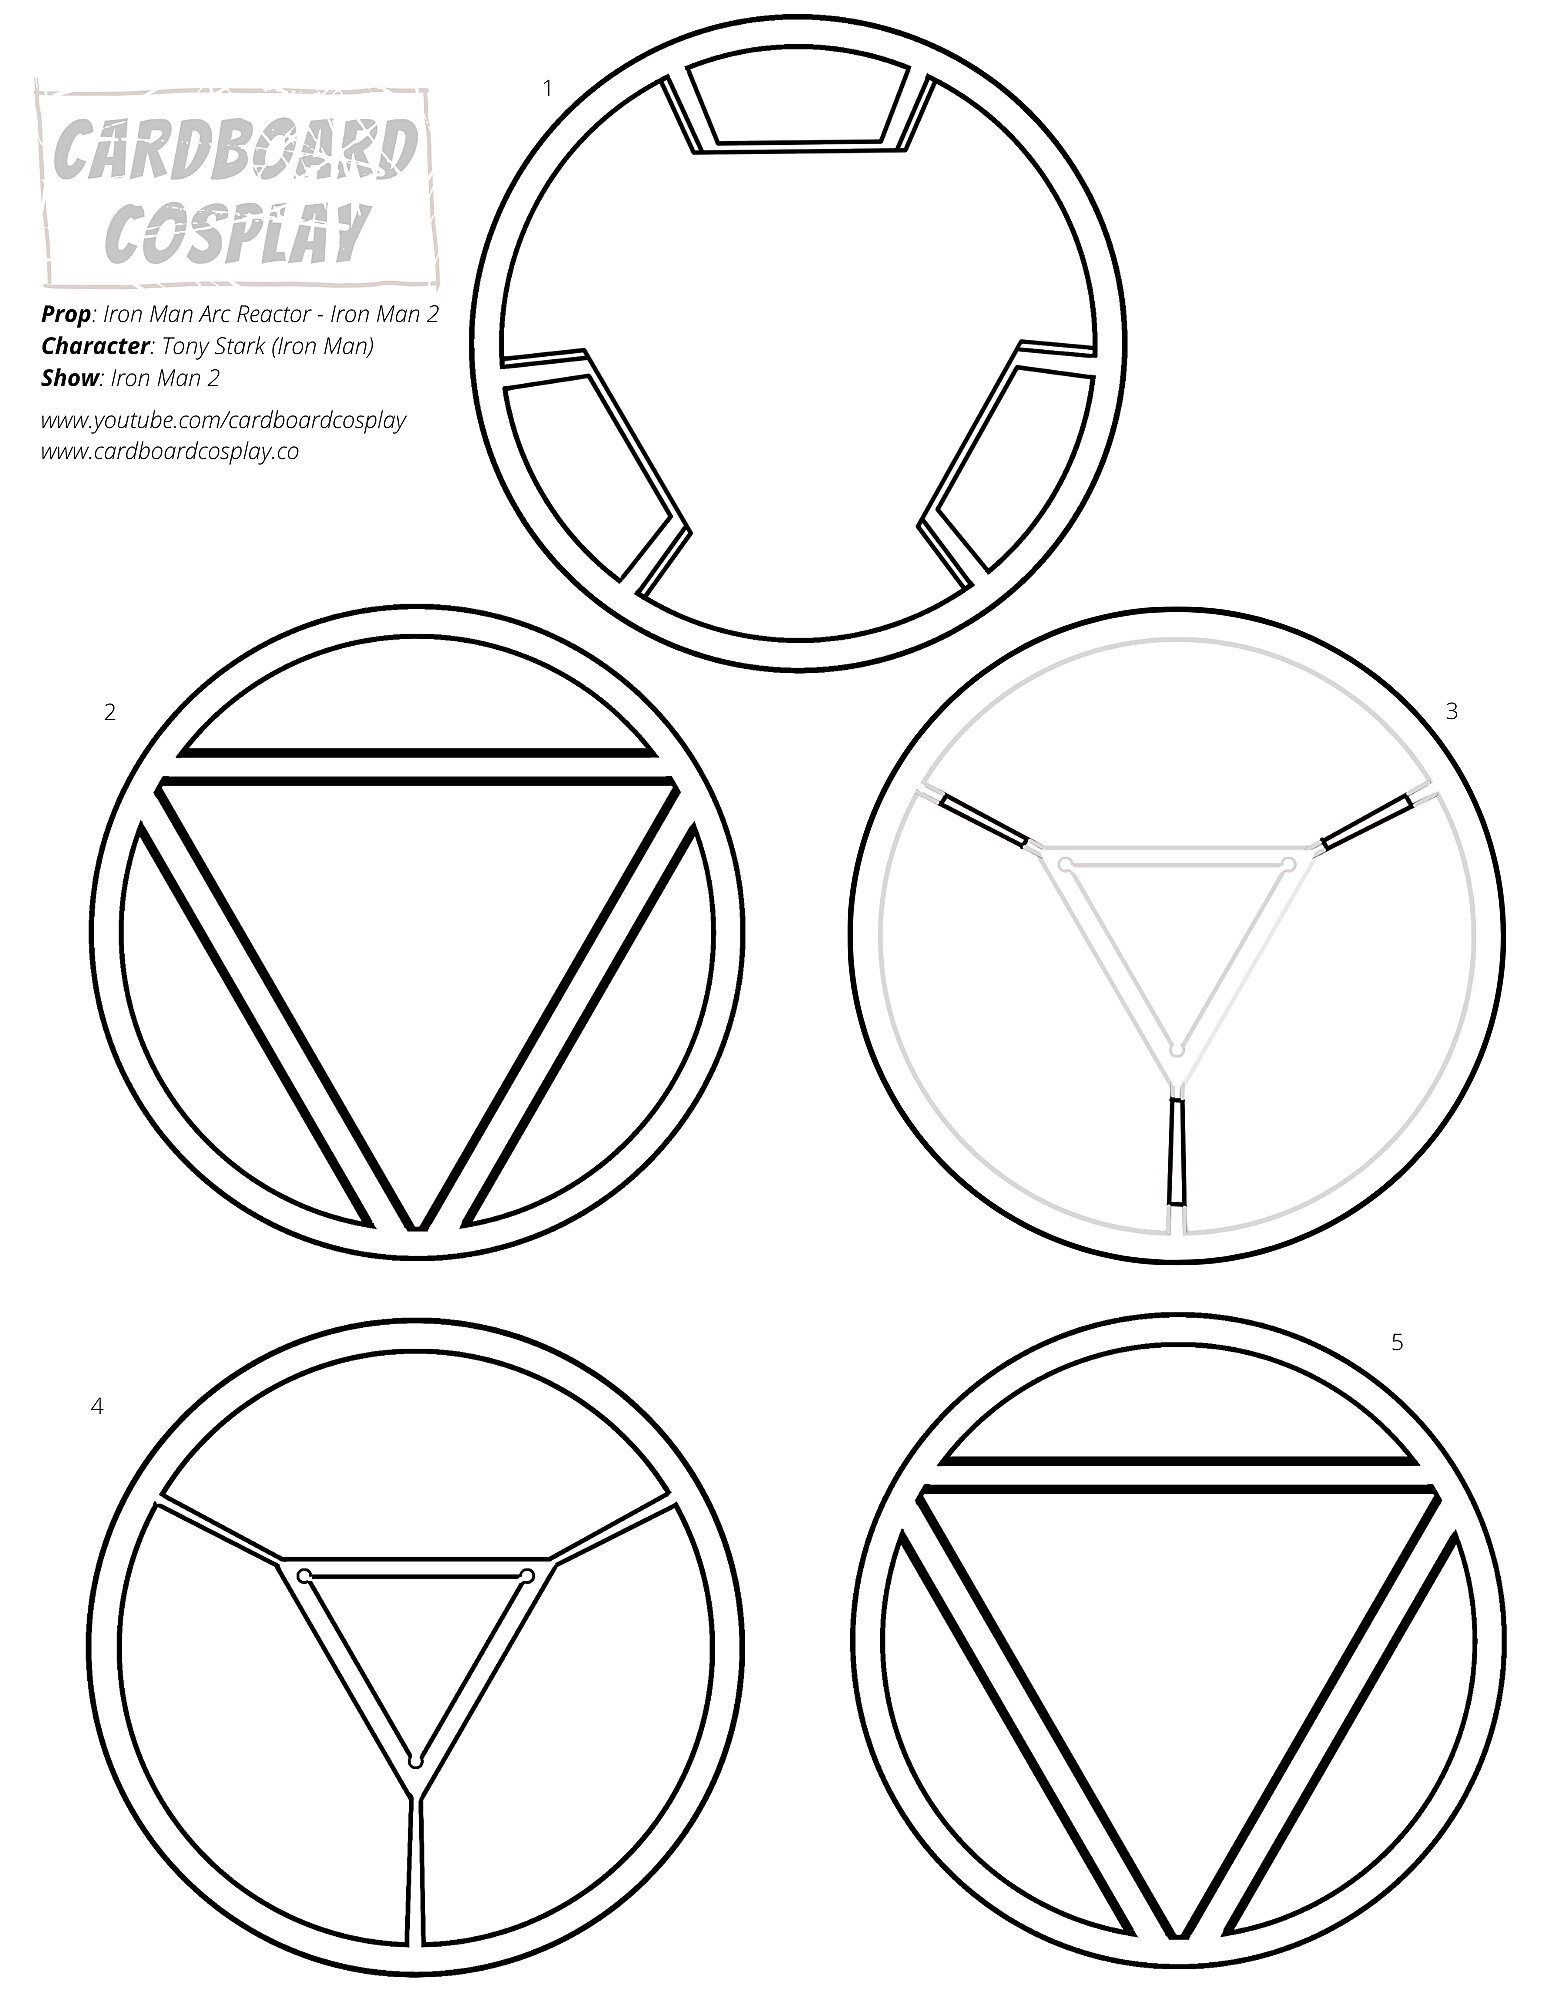
- Print out template.
- Roughly cut around each circle on the template and tape these circles onto cereal box cardboard.
- Cut out the circle designs. It’s easiest to cut out the insides first, then the outside.
- Glue on some edging to the bottom cardboard layer.
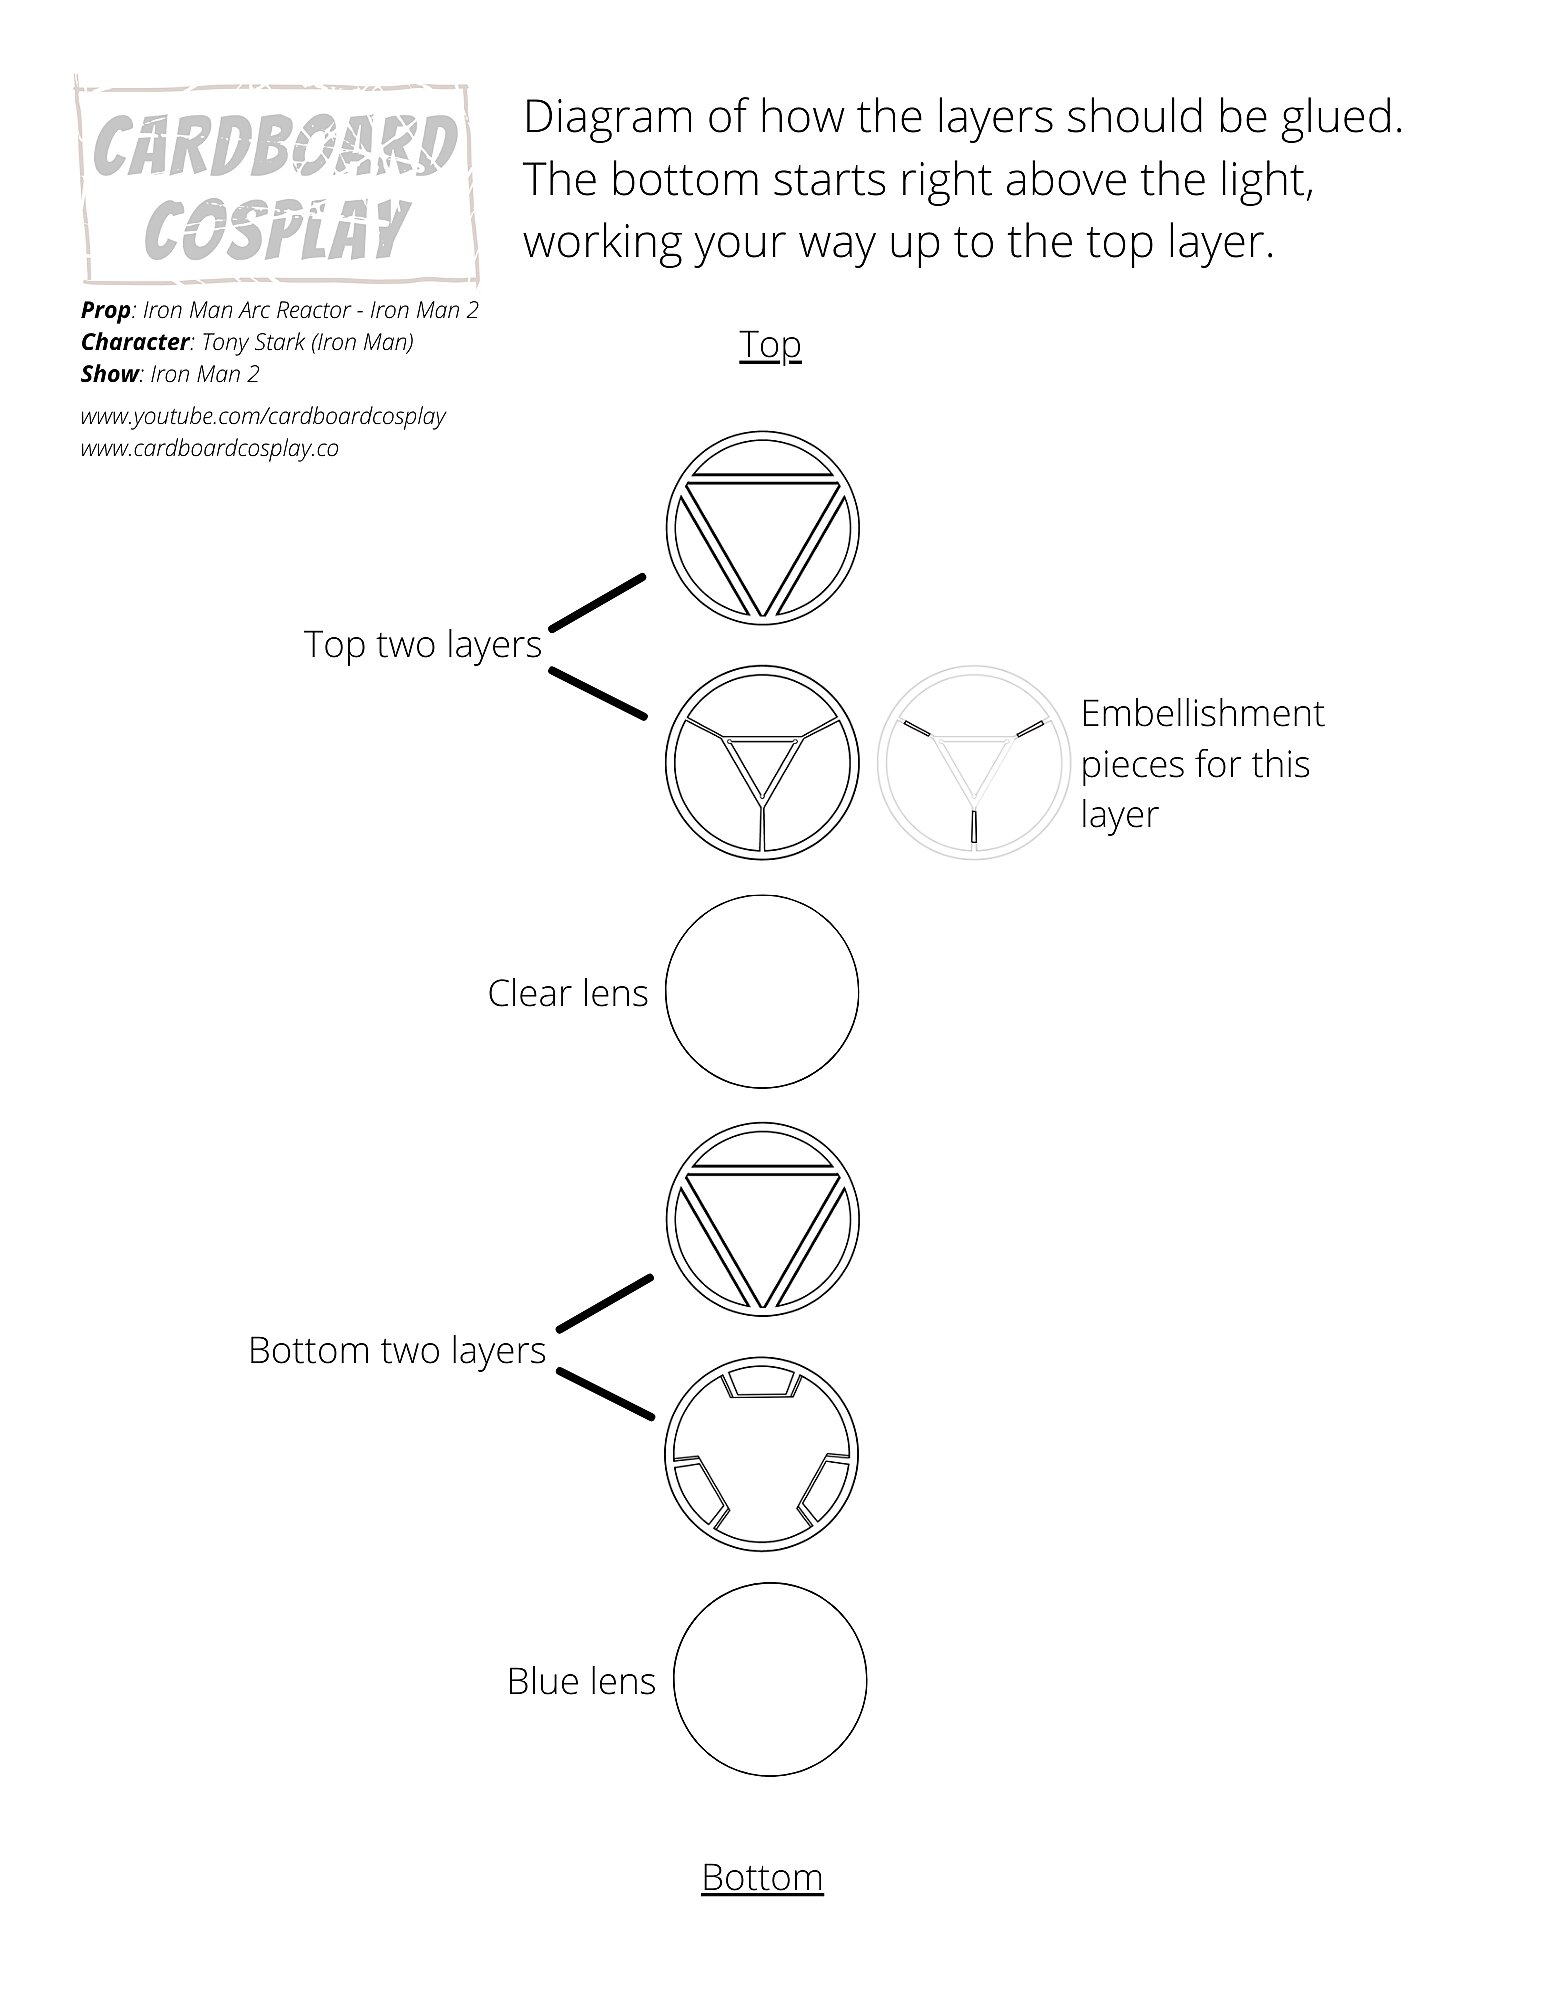
- Glue the bottom two layers together (pieces 1 and 2 on the template).
- Glue the top two layers together (pieces 3 and 4 the template).
- Glue the embellishment pieces (piece 5) onto piece #3.
- Using piece 5, trace and cut out two circles on the plastic. These will be referred to as plastic lenses.
- Take 1 plastic lens and gently sand 1 side of it until it looks frosted/foggy.
- Paint this rough side with watered down blue craft paint. Put off to the side to dry.
- Paint all cardboard pieces in black craft paint and then metallic silver craft paint.
- Cut out a small triangle of wax paper and white computer paper. Glue this triangle onto the bottom of piece #2.
- Using piece 5, trace and cut a donut out of corrugated cardboard so the hole fits the bottom of your light. This hole can be used to change the batteries of your light.
- Hot glue in the light.
- Add walls to your desired height. Walls are just cereal box cardboard rolled and glued around the outside of the donut. I used a 1.2 inch measurement but you can make it thinner if you’d like. If using a push light, make sure you can tap it easily.
- Cover the inside with aluminum foil. Use glue to secure the foil in place.
- Hot glue on the blue lens, shiny side up.
- Glue the 2 bottom design layers on top of the blue lens.
- Glue on the clear lens.
- Glue the 2 top design layers on top of the clear lens.
- Paint sides in black craft paint.
- Paint sides in metallic silver craft paint.
- Add hook/loop or glue onto shirt in order to wear it.
- Enjoy!
Template:
**prints out on one page of regular computer paper (8.5×11 inch)**