
Moon Knights crescent darts made out of cardboard from cereal boxes!
This prop is modeled after the Moon Knight show premiering on Disney+ at the end of March 2022.
I’m really happy with how it turned out. I love that the paint looks like real metal and that the blood splatter gives it some life, ironically, since Moon Knight probably killed someone for it.
Hope you guys enjoy!
Materials List:
- Computer Paper: https://amzn.to/3B8NpDP
- Chipboard (I used old cereal boxes): https://amzn.to/3omh7xE
- Scissors: https://amzn.to/3v6srlg
- Utility blade: https://amzn.to/3orJXMV
- Glue gun: https://amzn.to/3PwdPnp
- Glue sticks: https://amzn.to/3PFlX4w
- White glue: https://amzn.to/3v2cbBK
- Joint compound (optional): https://amzn.to/3PBwUUW
- Craft paint (black, silver, copper, red): https://amzn.to/3v4YUZ2
- Paint Brushes: https://amzn.to/3OluJnf
- Masking Tape: https://amzn.to/3Pv8RaG
* Disclosure: Some of the links above are affiliate links. This means that, at zero cost to you, I will earn an affiliate commission if you click through the link and finalize a purchase. Thank you! *
Steps to Make Moon Knight Crescent Darts
- Print out template. It should be 6 inches across from the widest point.
- Break down 13 cereal boxes. Keep the big, flat sides. Cut each one in half so you have 26 pieces of cardboard (each cereal box will fit 4 tracings; that’s 2 per side).Stack them in stacks of 4.
- Use white glue and glue together stacks of 4. The last stack will only have 2.
- Weighed them down with something heavy so they dry flat.
- Cut out the first piece of the template, the bigger piece. Tape Piece #1 onto one of the stacks, and cut it out with a utility knife or scissors. Repeat for all the stacks.
- Glue all of these stacks together using white glue. Take your time with this to make sure everything stacks up nice and neat.
- Weigh it down with something heavy so it dries flat.
- Cut out the second piece from the template, ie Piece #2. This piece needs 4 layers… so a stack of two on the front of the crescent dart and the other two on the back of the crescent dart. This will take 1 more cereal box to complete.
- Glue those layers together. Tape on the template, cut it out, and repeated it for the other stack.
- The next step is sanding. You can sand everything by hand, use a dremmel, or even a palm sander.
- Sand the inside of the weapon on both the front and back in order to make the points come to a point. The goal is to taper the points so it’s like a wedge and also taper the center at a steeper angle so it loosely resembles a blade. Wear a mask to protect your lungs.
- Once you get your desired shape, glue Piece #2 onto it.
- Sand the other side of the crescent dart so the edges are rounded off.
- If your cuts aren’t exactly even, there will be some gaps. So if you have gaps fill in with joint compound. Use gloves. Smear it on, let it dry, and lightly sanded away any bumps.
- Decorations:
- Each of the cutout openings needs a rough looking texture so use a tiny amount of hot glue and smear it inside each opening. Keep all the glue inside the little cutouts.
- Using the template, cut an ankh out of cereal box cardboard for each side.
- All other pieces can just be random bits of cereal box scraps.
- Paint Job:
- Step 1: Paint in black craft paintStep 2: Paint in 3 light coats of metallic silver craft paint.
- Step 3: Mix together silver with copper and lightly paint over the entire weapon with this mixture.
- Step 4 (optional): if the black in the cutouts is too dark, mix together black and silver craft paint and repaint these sections. You don’t want it to be too dark.
- Step 5: Add a very light layer of black/silver craft paint between the blade and the upper portion.
- Step 6: Lightly paint the entire thing in silver again to bring out some highlights.
- Step 7 (optional): mix together red copper, and a little black craft paint to get a dark blood color. Paint blood splatters on either end of the prop.
- Enjoy!
***Alternatively you can use a piece of EVA foam instead of cardboard! Just skip all the cardboard parts and go straight to the sanding. ***
Template:
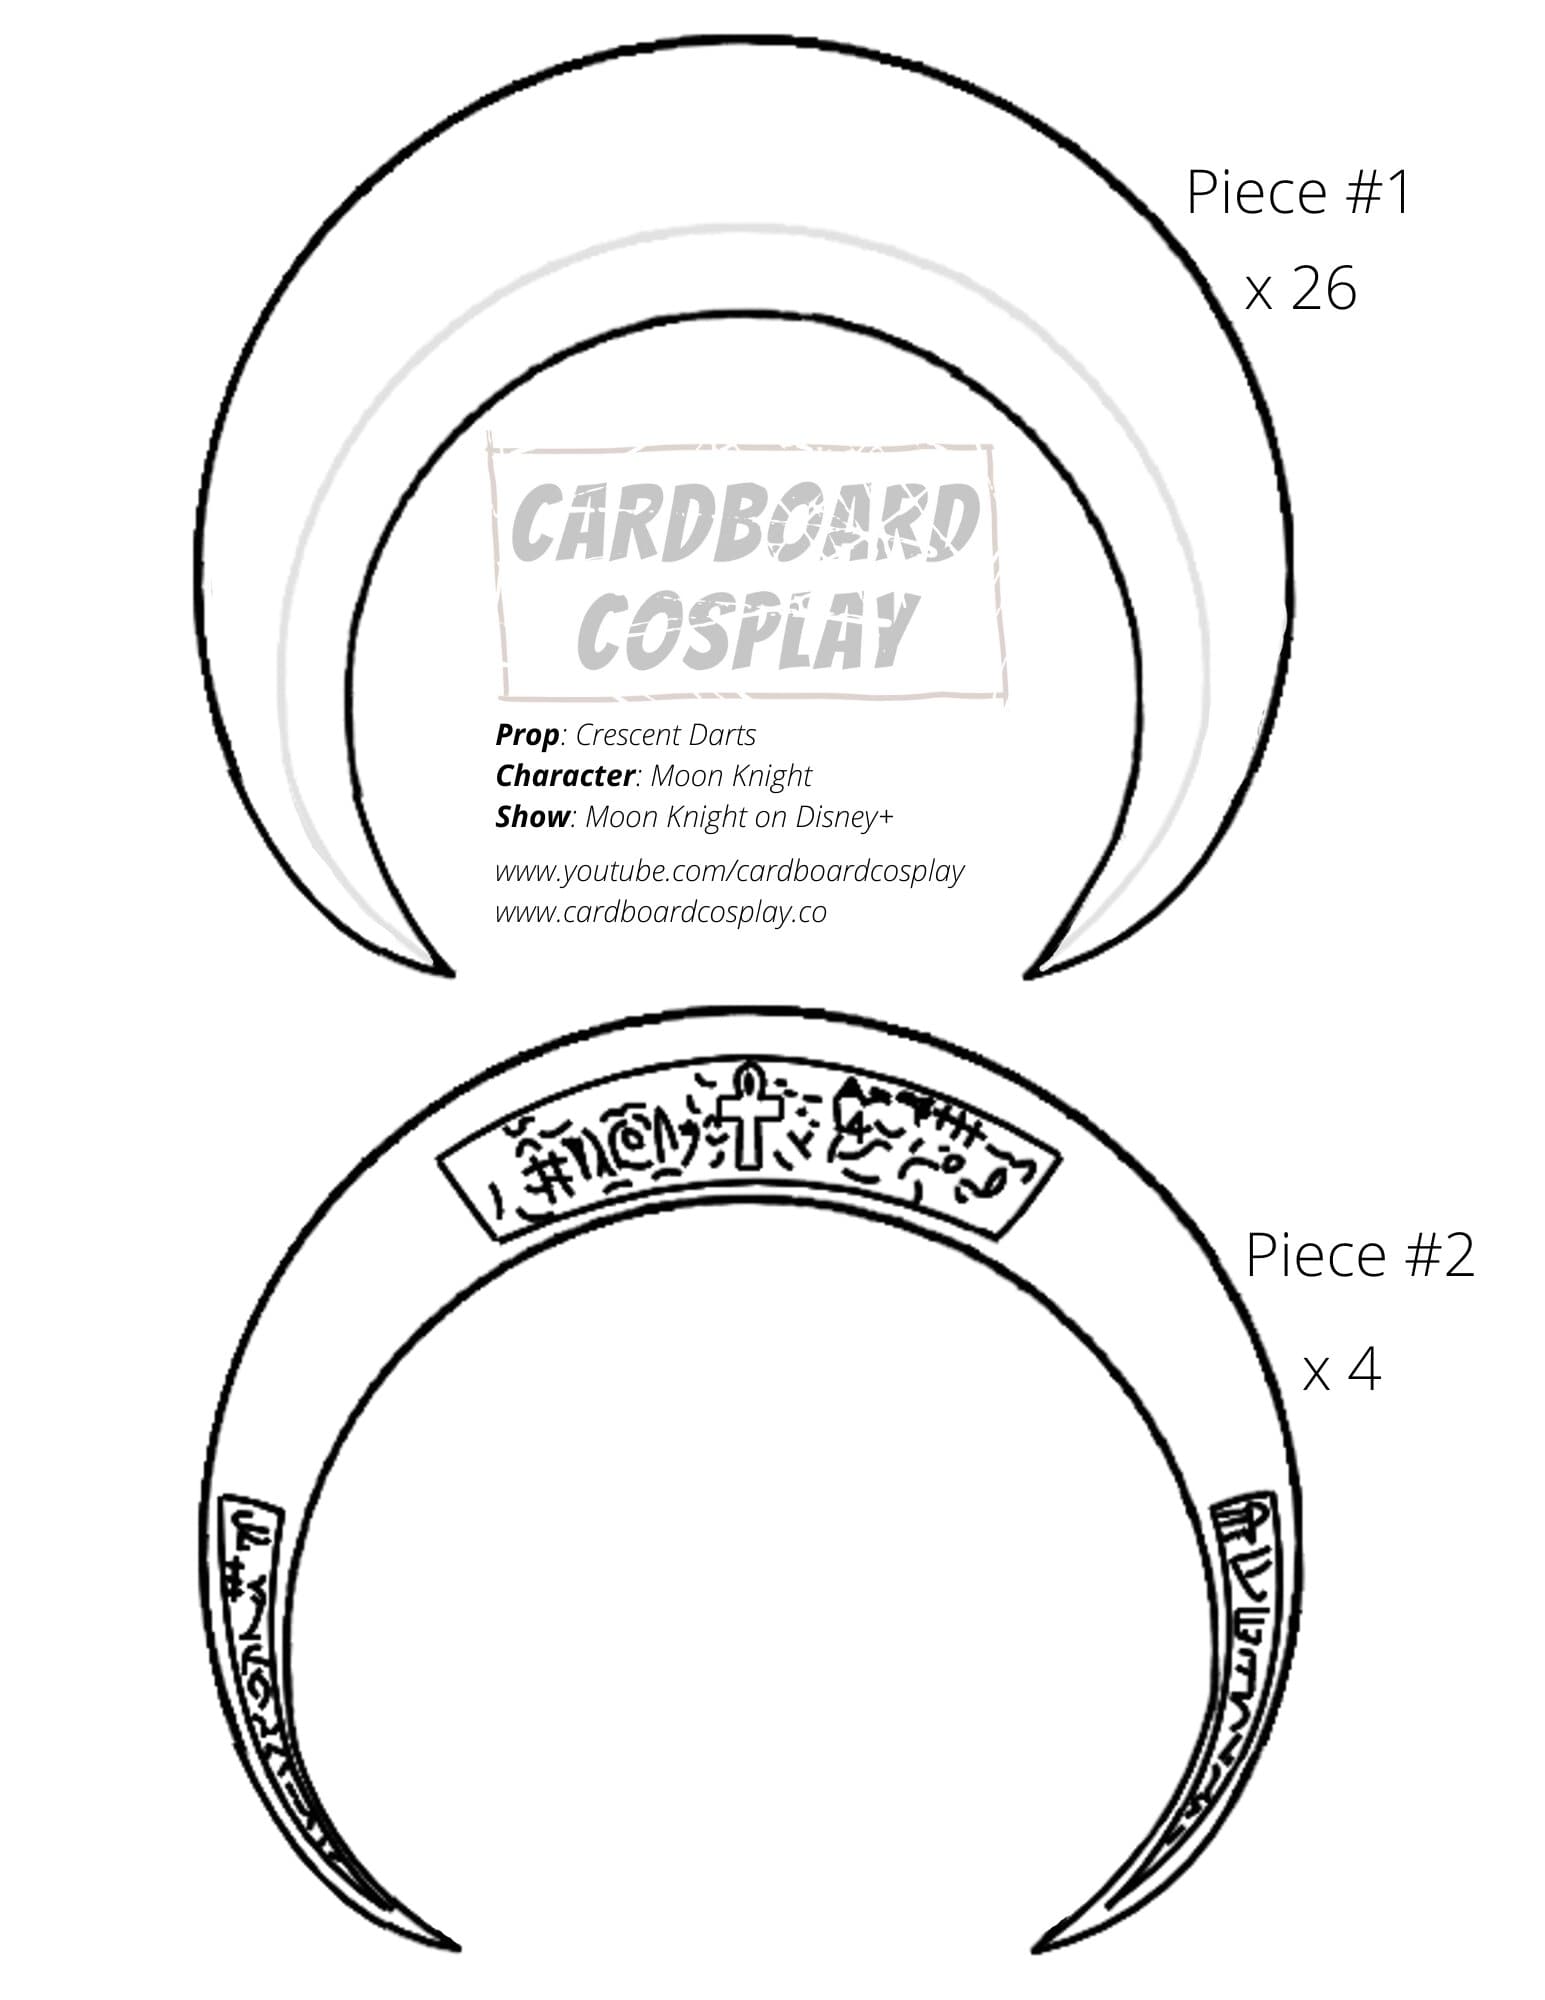
**prints out on one page of regular computer paper (8.5×11 inch)**