Hi everyone, I’m Stephen and today I’m using cardboard to make the batarang from the movie “The Batman”. As of the time of this video, I haven’t seen the movie yet, but I’ve heard pretty good things about it. Overall I like this DIY batarang. I modeled it after the Sideshow Collectibles life-size replica and it ends up looking pretty legit. I hope you guys like it!
* Disclosure: Some of the links above are affiliate links. This means that, at zero cost to you, I will earn an affiliate commission if you click through the link and finalize a purchase. Thank you! *
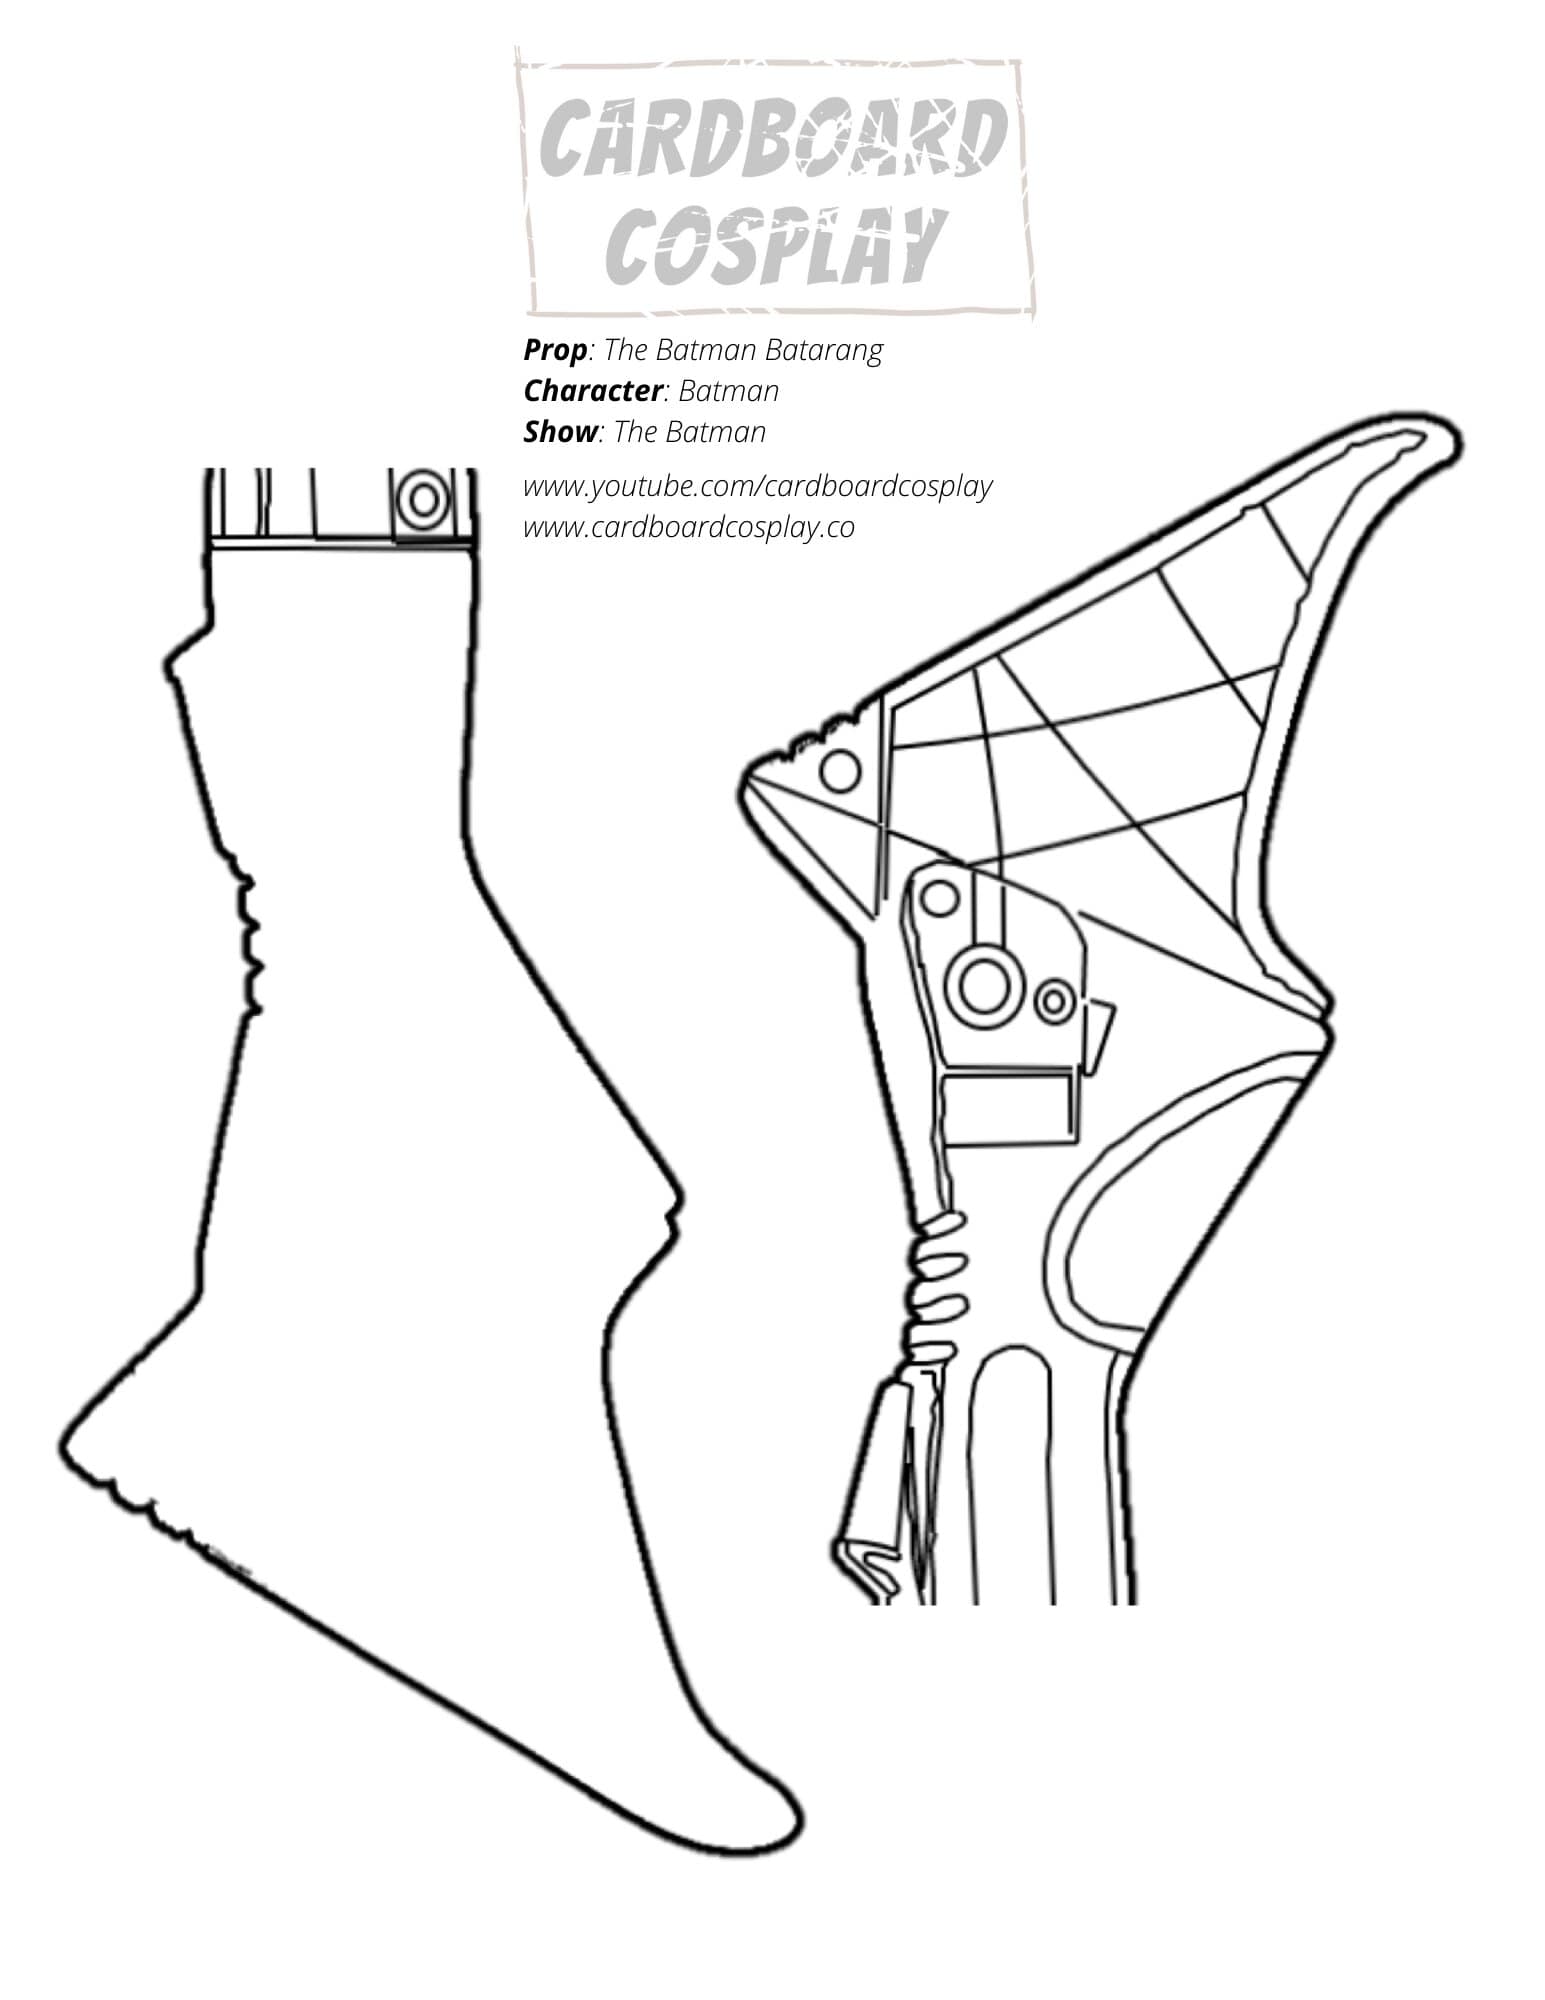
Steps to Make The Batman Batarang:
Print out template.
Trace the template onto a piece of corrugated cardboard two times.
Cut out with a utility knife and put off to the side.
Cut the little wing tips off each side of the template.
Trace this smaller template onto more corrugated cardboard two times.
Cut out with a utility knife.
Glue all the four layers together (you may need to trim up the edges).
Take wing tips and cut out all the little designs 4 times.
Glue down on wing tips.
You might need to trim and adjust the pieces to fit whatever you cut out and traced. It’s all going to depend on how neat you make everything. Leave small gaps between pieces.
Trimmed down the template to just show the body.
Trace that onto cereal box cardboard 4 times.
Cut it out.
Glue it down.
Add on accent pieces.
There are 2 perforated detail pieces on the front and back of the boomerang. To get that texture, take a pen and carefully stab at the cereal box. Stabbing it punctures holes in it.
The raised up portion on each corner:
Cut out 2 layers of the smaller piece and glue them together in a stack. The purpose of the stack is to help make it thicker.
Cut out longer piece to cover the smaller piece (except for the little slanted button that’s left exposed at the bottom).
This longer piece gets folded so it looks like it’s bent.
This bent looking detail piece gets added to each of the 4 corners of the body…so 2 on the front and 2 on the back.
Use a hole punch for any fake screw heads.
Fill in all the corrugated holes with drywall joint compound or tape.
Paint job:
Base coat: black craft paint
The little fake buttons: orange craft paint
Fake screw heads and gaps on wing tips: metallic silver craft paint
Finishing: mix together the black craft and silver craft paint and paint over the entire boomerang, except for some of the silver and all of the orange.
Dry brushing: silver around the edges and to add wear/tear.
