One of the coolest things in the Wandavision series on Disney+ was the appearance of her comic accurate costume in the 80s styled Halloween episode. In this episode, Wanda Maxmimoff wore a unitard and large red headpiece. This headpiece is so simple to make. You can either use craft foam or cardboard. Feel free to use the free template and follow the steps below to make your own Wanda Halloween Costume headpiece!
* Disclosure: Some of the links above are affiliate links. This means that, at zero cost to you, I will earn an affiliate commission if you click through the link and finalize a purchase. Thank you! *
Steps:
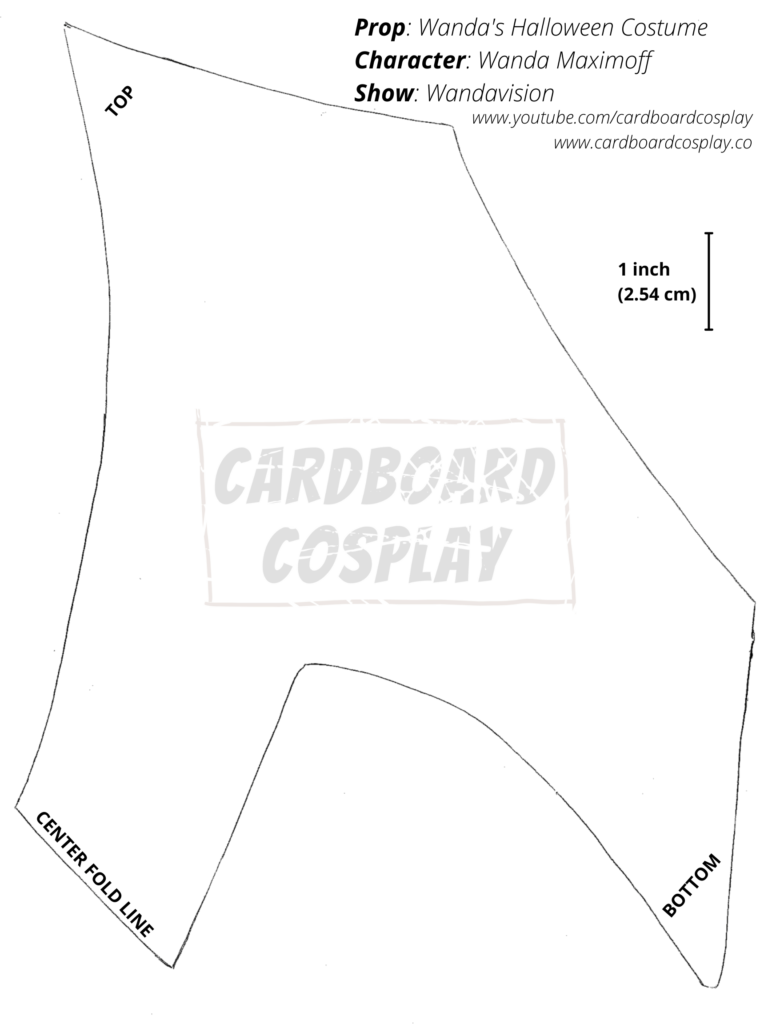
Download and print out the template. This template is for one side of the headpiece.
Cut template out.
Trace onto a large piece of corrugated cardboard with the corrugation lines running vertically.
Flip over and trace the inverse of the template, lining up the centers. This will give you the full headpiece.
Use a utility knife to cut out the headpiece.
Bend in half so there is a sharp crease in the center.
Use your hands to bend along the corrugation lines. This will allow it to be curved when worn on your head.
Use your hands to bend out the tips of the top of the headpiece so they look flared out.
Carefully hot glue flimsy poster board onto the front of your headpiece.
Use a utility knife to cut off all the excess.
Paint with 3-4 coats of red craft paint.
Hot glue elastic or elastic headband on the back of the headpiece.
